So in my previous post I discussed making dividers. This is a follow-on post which will show you how to print cut and laminate them.
Option 1: Cardstock
Cardstocks are some beautiful designs and they can look really great. The easiest thing to do is to go to a local craft shop and have a look at different cardstocks. I recently went to Hobbycraft and picked up a beautiful Christmas themed pack for another project. Cardstock books have themes that will complement but you can mix and match with different card you find in the store. They’ll hopefully be a lot of choice. I am using my cardstock for a different project but it is so beautiful I may make some dividers with it at some point.
Now you make your divider you can take an existing template, if you have ones that came with your filofax/planner. If not you can take a template of a page and draw round it and add a tab if you want one. You can also draw one onto the card with a ruler and have the outline that way. Once you have a template to follow simply cut them out.
Option 2: Printing from Publisher
If you are printing on a personal sized template page to get crop marks you’re going to want to make sure you have crop marks selected, you are also going to need to onset your pages a little to make sure they line up. My previous printing post has a very good step by step guide, so please go and read that one to set it up properly.
If you are working on a4 paper it should be really easy to print. Just select to print double sided.
Ctrl + P > Make sure landscape is selected > change print one sided to Manual 2 sided Printer flip sheets on long side.
Printing is printer specific so it’s best to experiment a little with how your printer prints thinks. To save ink you can do this in black and white or work on just putting shapes or words on a publisher page – to save wasting ink.
Once printed it’s time to cut them. I recommend a stanley knife, cork board ruler and a cutting mat. It’s cheaper than a investing in a guillotine. Now you want to have a nice clean edge without any white on it, so it’s best to place the ruler on the white next to the divider and cut. I normally prefer to rest my ruler onto the colour/printed image and cut away from it, but with dividers it’s better to see the print so you can see if you’ll get any white showing, rather than not trim enough. It can be hard to tidy up with a stanley knife as I’ve found it tears, so it’s a good idea to get it done in one cut.
Laminating
Now is the fun part, well it’s not really fun, I just find laminating therapeutic/fun, I don’t know why. I got my laminator on Amazon. The one I got had a recommend retail price of £50, I got it on sale so it was much cheaper than it was listed on at the moment (I got it for less than £20, it’s currently at £26.50 19/12/2015). There’s nothing special about this one it doesn’t have a heat setting to turn it up or down or do anything fancy. It works well but you can probably get a cheaper one, this was just a really good deal when I got it. I use Textet Laminator Pounches, I really like this set as a starter set. They have a bunch of different sizes so don’t have to buy a ton of different packs to get a variety for different project or wait to have enough to laminate. These have a nice thickness to them and they make my dividers feel sturdy but don’t add loads of bulk to my planner.
I recommend working on your cutting mat. Place the laminating pouch on the mat and open it – they can be quite prone to causing static so it can be a bit fiddly. Place your items on the sheet, you need a good balance between filling it to not waste the laminating sheet and allowing a gap between the images. It’s good to have them on a cutting mat because it’ll limit the chances of the divider moving when you pick it up – and risk them sticky. It happened with my sticky notes.
Plug your laminator in and allow it to reach temperature. When ready gentle slide the sealed edge towards the edge of the cutting mat. Lift the mat and feed the sealed edge into the laminator. Keep the mat steady as the sheet feeds into the machine. Went until all the laminator has gone through before removing the mat – this will save dividers moving. Once laminated you can leave the item to cool again.
Now you can cut your dividers again. My laminator is good enough that I don’t have to leave a sealed edge so I try to minimise that as much as possible, but it’s personal taste. I recommend leaving an edge for my reuseable sticky notes for cleaning them. If you did your dividers the same size as pages leaving the edge with a laminator will make them a bit bigger. Once cut you can punch them. If you’ve not labelled your tabs a great way to keep them usuable is to write on them with a pen like this. You can wipe it off and rename the tab later if you wish.
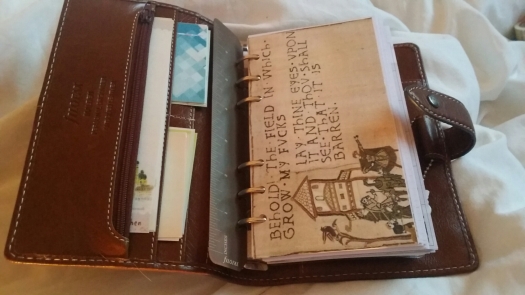
This is my current front page and it makes me smile!


i love your Anne Frank div.
LikeLike
Thank you. That was used as a cover for my diary. My diary is named after her diary.
LikeLike