Collections in my Planner: A Lifetime of Movies

This is the first in a new series of what Collections I have in my Planner. I follow the Bullet Journal system which is a series of rapid logging tasks in a planner, you can find a previous post on it here. Part of the system is collection making, which is grouping together a series of bullets on one page. Over the next couple of weeks I will share a couple of the collections I use. Today’s version is a Lifetime in Movies.

I got the idea for a Lifetime of Movies, which is basically as the title explains. It’s a collection of movies from every year I have lived. I did a search of IMDb for the top film of each year from 1988-2016 and I wrote the number one movie down. Now I did this in December which is suspect may have influenced the choices, as quite a few are Christmas Films, but hey some of those Christmas films are pretty good so I suspect they are pretty high up for a reason. I’ll be reviewing them over the coming weeks so check out my blog and see what I thought of them. I may revisit this idea after I have completed the list, if I was to do it again I’d probably look at most awarded movie of a year or something to give a variety and potentially reduce the number of Christmas films a little.

How to start a Bullet Journal

I am a member of several groups on Facebook about bullet journaling and one of the most asked questions is how to start. Followed probably by how to you get them to look so pretty.

I think we need to stop right there and pause for a second. I do not believe a bullet journal should be about making it pretty. It is first and foremost a functional tool. That doesn’t mean that it can’t be both functional and pretty. Yet, often there are comments on forums about how people have started, made it overly complicated and then find they are not sticking to it. You need to make a bullet journal work for you. If you then have five minutes to spare where you want to add decoration to it that is fine also.

This blog is intended to be a step by step guide to how to start a bullet journal.

  1. Pick up a bullet journal, if you have an old notebook lying around use that for now. Dotted is a popular choice, but I personally prefer grid. Lined works well to and you can always just a ruler to insert squares into a lined journal until you find a method you prefer.
  2. First watch the original bullet journal video!
    It will help you understand what it is.
  3. You can also check out the webpage: bulletjournal.com
  4. Start with your future log, count the number of squares on your page, divide by three. Draw lines and equally divide the page into thirds. Once done, repeat so all 12 months are covered. Next label them and add any events you already have for the months.
  5. Then start with your month. List all the days of the month in and then the corresponding initial of the day of the week. Write tasks in.
  6. Now on the next page write your monthly tasks.
    Note: This is where I differ slightly from the original. I don’t have a monthly task list.
  7. Next, either on a new page or underneath your monthly task list write today’s date.
    Fill out any appointments you have to do that day, any tasks, maybe some notes from your day. You can also journal. This is where you personalise it to your heart’s content. Maybe you are really bad at house cleaning and want to be motivated to do it more – write it down. It’s very satisfying to tick them off. When you have a task you need to do, write it straight away in your journal, otherwise you may forget. It’s handy to always have it open on the desk. If you are really bad at checking your planner try setting an alarm or a reminder to force you to check. It’ll become habit with time. At the end of the day tick off all the tasks you’ve done (you can do this as you do them too).
  8. Writing out the next day. Now this is completely up to you – you can do it first thing in the morning or last thing the night before. I tend to do it in the morning, unless I have an appointment. If I have an appointment I like to prep the night before, make sure I have the right details, know where I am going, maybe confirm the appointment is still on. Then proceed to the next day. A really important point to make is that if you have tasks from the previous day, don’t migrate them over to your new day. Just look back through your planner and see the open tasks you need to do. Then complete them. If you have a stressful day and really just want to focus on a simple list you must complete for the day – then I recommend writing down tasks again, and migrating them to today’s list. This will keep you focused and on task for the day.
  9. After your first month you can access how the bullet journal worked for you. Maybe dailies are really you thing and you would like to migrate to a weekly view, then you can start creating weekly layouts in your journal. Maybe you find you have tasks that repeat themselves almost daily, and rather than rewrite it out each day you could have a weekly tracker at the start of your week. Maybe you find some gift ideas you’ve randomly dotted in your lists could actually go on a separate page – in which case create a collection.
  10. That’s basically the basics of a bullet journal. The most fancy I get is changing out the ink in my fountain pen to a new colour every month. If you want to be more creative and use washi tape or colour in things – great go for it, but remember to stick to the basics of a journal. Sometimes journals can be great for when you are battling with depression. I didn’t always have places to go or people to see – but I could complete basic tasks, even if it was just brushing my teeth, making lunch and washing my hair. Baby steps helped me to become more human and work my way back into a normal routine. Maybe you use your for a photo diary and print a photo off everyday and journal a bit about your day. Use it to plan your dream holiday, your wedding, you academic studies. The trick is to find a way to make it work for you. But in doing that process don’t look at other people’s pages and feel intimidated.

Finally, the most important process I cannot stress enough is just use your planner. It doesn’t have to be perfect – life is not perfect. So you smudge your ink or you miss something off, you spell something wrong. That’s fine. It doesn’t mean your journal is suddenly terribly. I know that some people have OCD and a desire to be perfect but it really doesn’t matter in the grand scheme of things – you make a mistake but tomorrow or the next day you’ll flip the page over and probably never see it again. There is a Japanese concept called Wabi-sabi, which encourages people to see the imperfections in life and to celebrate them. Imperfections make things unique and special. Maybe writing February wrong one month will give you a bit of a laugh in a few months time. Maybe your toddler took a pen to your page and ruined it – or maybe they left you a little picture you will cherish in a few years time. Embrace these things and have fun.


Planner: Currently Using

My planner system has changed quite a bit since I last did a post it on. I’ve made a structure change and I moved to a6. I am currently in a VdS Touch Me in Gris Blue. This is one of their new colours. I plan to do a full review of it in due course.

My actual system hasn’t changed too much since September when I started using A6 size. I have a very traditional bullet journal. I am using a Rhodia Graph paper pad that I have ripped apart and hole punched (rather unsuccessfully as it’s not very straight!).

My Bullet Journal largely follows the traditional system.

At the start of the month I write the numbers for the month out and the corresponding days and I fill in information from my future log.

Then at the start of the week (because the new year began on a Sunday I have switched to a Sunday start, it’ll be interesting to see if I like this…) I write out a weekly tracker which I will fill in for the week.

Underneath that I start directly with my dailies. I just write the day and then log everything for the day.

What I really like about this system is the flexibility. My first daily was nearly two pages long with all the to dos and lists I wanted to keep track on in my planner. I love that I am able to write everything down and it is in there. I like that there is a place where I can record anything and everything in whatever order I want it to.

I don’t tend to migrate tasks over to each new day as that is such a waste of time, effort, ink and paper. So instead I tend to flick through and look for open tasks I need to complete and only transfer them to a new month if they have not yet been completed and are still relevant. There are of course a few downsides to this method – it can become a little cluttered looking and it can be quite hard to focus with so many bits of information around the place. It doesn’t always bother me until I really need to focus and get tasks done on a set day. On those days I find it best to start the day with a very simple outline of places I have to be and tasks I have to complete. I will migrate these to the set day and try to give myself a realistic number of 3-5 tasks depending on the complexity of the tasks, to ensure that there is enough time for me to complete them. Then I just shut everything else off and focus. I find this method works really well.

I like that I don’t have to design and print out loads of pages, if I want a new page I just write it. I love that the paper I use is fountain pen friendly and I can write with my new found obsession (more to come on this topic in the future…). I tend to change my ink up once a month to have some variety and use up my growing collection of ink. Unlike traditional bullet journalling which is done in a bound notebook, I love that I have control to move pages around and take them out as I need to. I like that I can flick the page over and start writing a new collection – but then I can move collections towards the back on my planner to keep them in alphabetical order so it is easier to find them. My monthly, weekly and the start of my collections are marked with the coolest paperclips in the world. They are of the Ampelmann – he is the East German crossing man, complete with hat. He is really cute and I am obsessed with him (a fact my lovely penpal Nicole knew and she sent my these cute paper clips!).

I find this is a great system for me and allows me the flexibility of having a daily when I perhaps wouldn’t need a full page each day. It is the ultimate brain dump as I can just throw everything at it and not worry about it looking pretty or having enough room!

*I was going to have photos with this post buy unfortunately a rather nasty flu has crept up on me. I am instead going to tease you all silly and leave it without photos until the next time I bring up my planner!*

Traveller’s Notebook: Make your Own Inserts

I’m going to have to thank Cheryl Payne for this tutorial. She emailed me a little while back asking for guidance on how to make traveller’s notebook inserts and she gave me a lovely compliment of saying my tutorials were easy to follow. So this is really for Cheryl (although I am sorry it is a little late!). I must start with a big word of warning – I don’t actually own a traveller’s Notebook so I have not printed these out or tested them. This is just a tutorial of how I would make them if I had a traveller’s notebook…

I’ll be making a simple dotted page for the passport size of notebook but first of all we need are trusted Publisher, so start by opening that up.

Start menu > All Programs > Microsoft Office > Microsoft Publisher

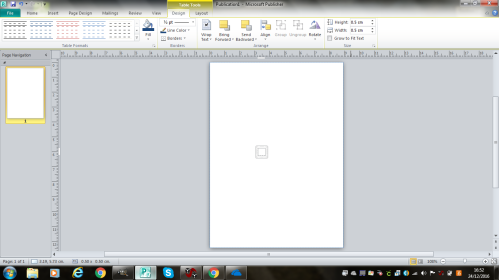
Next we need to create a blank template to the correct size, as it’s not standard you’ll need to create a new template. The first screen in Publisher should be the select your template.

Click More Black Page Sizes > Custom > Create new page size…

Width:8.9cm

Height 12.4cm

Margin guides – set all to zero.

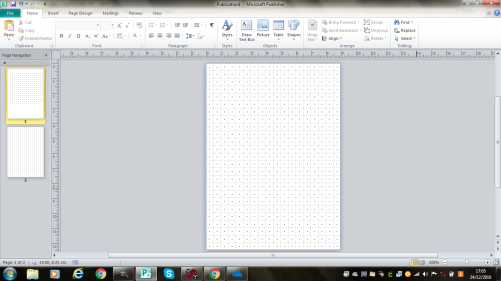
I’m going to make this a dotted note paper and to do that I’m going to create a table that is 5mm x 5mm.

Insert > Table > 1×1 Table

Once the table is created

Double click the table > Change width and height to 0.5cm

tn1

You’ll need to insert 18 squares across the width of the page.

Right click the table > Insert > Right

Keep going until you’ve inserted 17. To speed up the process you can highlight multiple boxes and insert right. If you select three boxes you’ll insert another three.

Align > Align Right

Will set your table to the right side.

Next we need to create 25 rows.

Right click the table > Insert > Below

This will create a slightly bigger table than the height of the page. Don’t worry about that.

Now we need to create the dots. Click the mouse to the first cell. Then go to the main task ribbon.

Insert > Symbol > Middle Dot (Character Code 00B7) 

Copy and paste the dot into each box by highlighting the first cell and pressing Ctrl + C and Ctrl + V. Once you completed the first role you can copy and paste the dot into each row.

Once each box has a dot in you have completed the page. You can then duplicate the page by.

Right clicking page 1 on the left hand side of the screen > Insert Duplicate Page

tn2

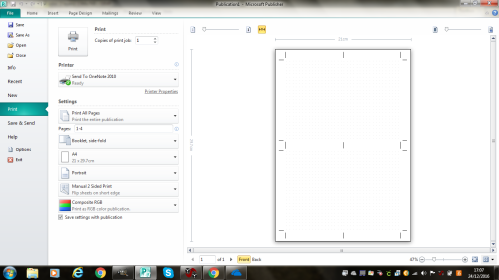
Now this is just a basic template you can jazz it up and get as fancy as you want with it. Just remember that a traveller’s notebook consists of four sides to one sheet of paper. To help explain this a bit better take a scrap of paper and fold it in half. There are four faces to the book. When printing faces 1 and 4 (the front and the back page) will be printed together and faces 2 and 3 will be printed on the back. It doesn’t really matter how they are printed in this tutorial, but it is more important when you design your own layouts. A trick to making it easier for you is to select the select the printing option of Booklet side-fold, as this will calculate the order of the page for you when printing. For a more in depth look at printing inserts please read my original post. The only different would be not to cut the centre crop marks but to merely fold the page over. If going more complicated layouts it’ll be a good idea to think of margin spaces to the left and right of each page as a fold may effect template design. I’d aim for a margin of about 2-3mm.

tn3

I hope this helps anyone looking to make your own TN inserts. If you have any question please feel free to add a comment below.

Hello again

It has been a long time since I have written a blog post. I think I just about remember how to do it! I can’t believe how popular this blog still is. I’ve been months since I have written anything but I am still getting around 2,000 visitors every month. I even have people subscribing, even though it has looked like I will not be writing for a long time.

Well it’s a new year and I am going to try my best to revive this blog! I have a few new interests since I stopped this blog and I am going to have a reshuffle and move around some links on the main page. I also have an increasing to do list of blog posts to write so with a bit of luck I’ll be getting on with writing them soon.

So thank you for those who still check out my blog and I hope you enjoy the posts to come.

Emma.